目次
How to setup f(x)wallet for import/restore
~Neetokenの為のf(x)Walletセットアップ インポート・リストア~
Metamaskのような互換性のあるウォレットをすでにお持ちの場合は、同じアカウントで使用できます。Metamaskをお持ちの場合は、こちらが良いでしょう。
[en] If you already have a compatible wallet such as Metamask, you can share it here and use the same account. If you have Metamask, this is a good choice.
import STEP 1
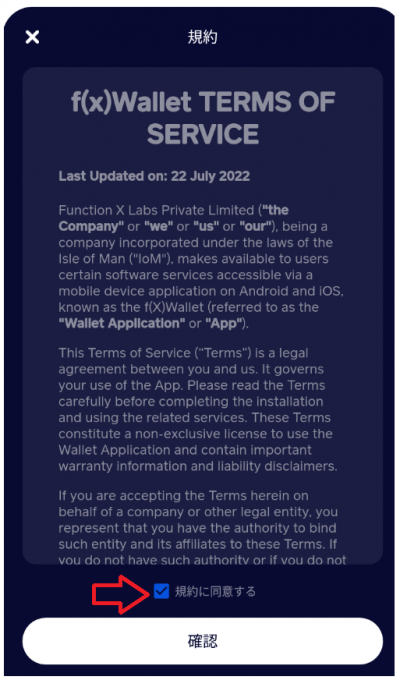
インポートまたはリストアを選ぶと規約がでるので同意して進みます。
[en] Select “Import” or “Restore”, then agree to the terms and conditions.
import STEP 2
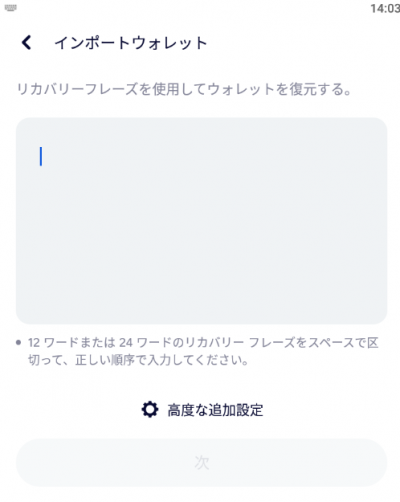
既にお持ちの秘密鍵である12または24個のニーモニックキー(プライベートパスフレーズ)を入力します。実際は、頭文字をタイプすると選択候補がでます。
[en] Enter 12 or 24 words mnemonic-keys (private passphrases), which are private keys you already have. Entering the first letter of a word will give you a list of possible selections.
「a」を入れた場合、以下の様に選べるものがでます。ただし、候補が多い単語は複数の文字を入力して絞り込む必要があります。
[en] If you enter “a”, you will see the following choices. However, words with many candidates must be close down by entering multiple letters.
import STEP 3
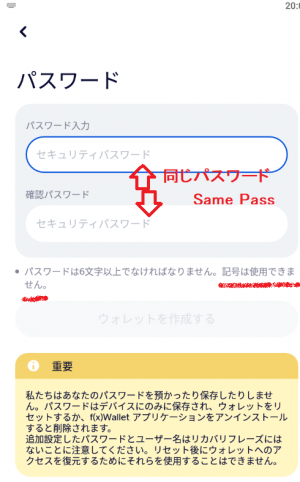
次はセキュリティパスワードの設定です。これはこのアプリを操作する際に求められることがあるパスワードで、アプリ固有のものです。再インストール時や別のスマートフォンに設定する際は改めてそこで固有のパスワードを決めます。
指紋認証も実装されているので、厳密には難しい長いパスワードを考える必要はありません。
The next step is to set the security password. This is the password that you may be asked for when operating this application and is unique to the application. When reinstalling the app or setting it up on a different smartphone, you will again decide on a unique password there.
Note, Fingerprint authentication is also implemented, so there is no need to think through long passwords that are strictly difficult.
import STEP 4
プッシュ通知の設定がでます。プッシュ通知の受け取りは便利です。
[en] You can set up push notifications. Receiving push notifications is convenient.
import complete
インポート完了です。続きは、元のフローの「STEP9」からです。
[en] Import is complete. Continue from “STEP 9” in the original flow.
> 元のセットアップ案内ページSTEP9へ / Go to the standard setup guide page STEP9.


